In this post I will show you step by step how to remove, clean and put back a key from an Acer Notebook keyboard (Aspire 7736Z).
1. First, search for a small screwdriver. A tweezers is optional but can help.
I will exemplify on "J" key.
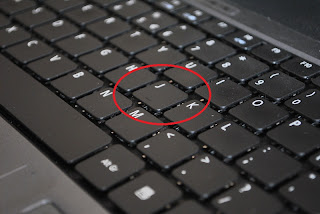
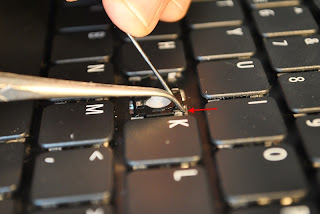
2. This step is the most important one and it will require you to handle the screwdriver very carefully.
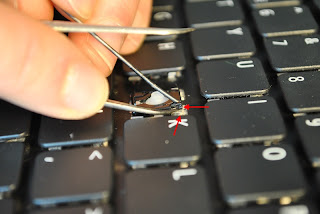
The key have tow main pieces: the plastic part with letter on it (the part that you can see) and beneath an "X" mechanism. Gently insert the screwdriver beneath the hey, between the part with letter on it and "X" mechanism.

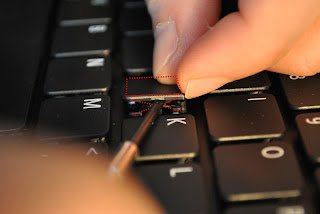
3. Now gently rotate the screwdriver until the part with letter on it detach from "X" mechanism. The part with letter on it have to detach from tow points.

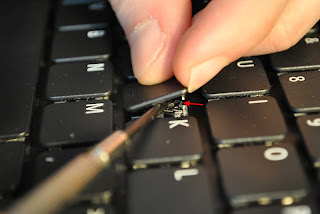
Here are those tow connection points between part with letter on it and "X" mechanism.
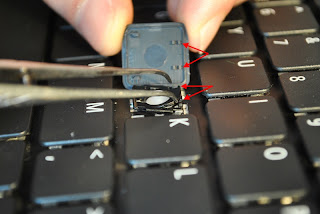
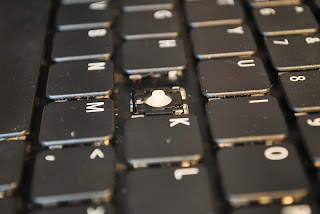
4. The hardest step was to remove the part with letter on it. After that, you may also need to remove the "X" mechanism. The "X" mechanism is attached to the keyboard in three contact points. With the same small screwdriver detach the "X" mechanism from tow of the three contact points.
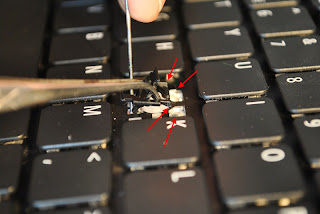
5. Now you can start the cleaning.

6. After you finished the cleaning, follow the steps back to the begining.
First connect the "X" mechanism to the lower connection point from the keyboard.
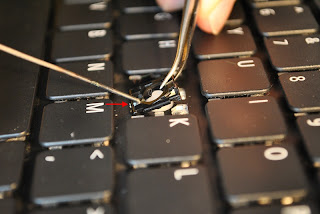
Then connect the "X" mechanism to the other tow connection points from the keyboard.
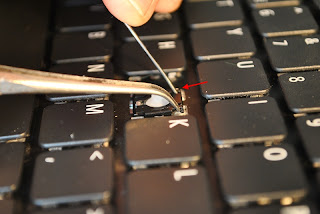
Now you are done with the "X" mechanism.
7. And the last part: attach the part with letter on it. First put the part with letter on it over the "X" mechanism and slided into the lower tow connection points of the keyboard.
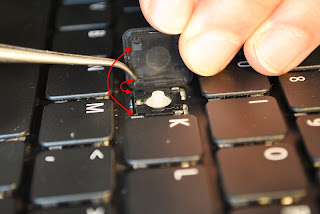
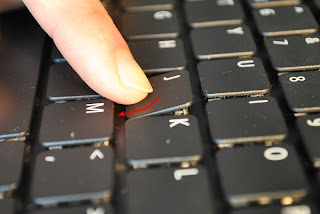
When the part with letter on it is in the right place, press on the upper left side, then the upper right side until it clicks into the initial position.


This is it. Now you have a clean keyboard.
Thanks for sharing your info. I really appreciate your efforts and I will be waiting for your further write ups thanks once again.
ReplyDelete15 Inches Laptop Skins online
This is really awesome and beautiful.
ReplyDeleteThank for this sharing.
Side Spiral Notebooks